Aligning your rubber to the blade
Printed From: Alex Table Tennis - MyTableTennis.NET
Category: Equipment
Forum Name: Equipment
Forum Description: Share your experience and discussions about table tennis equipments.
Moderator: haggisv
Assistant Moderators: position available
URL: http://mytabletennis.net/forum/forum_posts.asp?TID=86217
Printed Date: 05/03/2024 at 7:53am
Software Version: Web Wiz Forums 12.01 - http://www.webwizforums.com
Topic: Aligning your rubber to the blade
Posted By: fmarek
Subject: Aligning your rubber to the blade
Date Posted: 06/15/2019 at 12:55am
|
Hey From time to time I have to glue already cut rubber. There is a bit of challenge to glue it so that all edges are aligned to the blade. I was wondering what tricks do you guys use to make a good gluing. Given that rubbers did not shrink from previous gluing and still matches the size of your blade, what would you recommend? There is only one chance to attach it, and if misaligned then ... I hate these moments :/ I was struggling for a while until I developed a certain method which works perfectly for me. I will update this post later with how I do it. So who is first to share? ------------- 729 Green Goblin 5, FH: 729 Battle II National H39, BH: Palio HK1997 Gold. DHS Long 5, FH: 729 Battle II Gold H40, BH: Nittaku C1 |
Replies:
Posted By: mjamja
Date Posted: 06/15/2019 at 1:05am
|
I dry fit the rubber on the blade. Then I put a strip of painters tape along the top of the handle and onto the rubber. I then cut the tape into right at the bottom of the rubber so the rubber will separate. I add glue and try to align the two pieces of tape as I put the rubber down on the blade. Mark
|
Posted By: 808ponger
Date Posted: 06/15/2019 at 1:37am
|
I only recently figured this out but find some clear plastic film like ones that come with sticky rubber protectors and lay rubber like you would an OX sheet ------------- BTY Harimoto Stiga DNA M |
Posted By: symbat
Date Posted: 06/16/2019 at 2:04am
|
You need to share your tips.... seems like you are actually trying to ask for help? Yeah, I take two thin plastic sheets. The wrapping from a rubber package works ok for this. Take the first sheet and lay it on top of your blade. Do not cover the section that is 25-30mm above the handle. Just cover the top section of the blade. Take the 2nd sheet and over lap the first one slightly. Most of this sheet will be covering your handle.
At this point you have a glued blade that is covered with two plastic sheets. Now, you can carefully lay your rubber on top of the plastic and get it aligned how you want it. Now hold the rubber in place near the top/tip of the blade. At the same time lift the rubber up from the handle side. Just lift it up enough to uncover plastic sheet #2. Then carefully remove the plastic sheet and place the rubber back in position. Push Down on the rubber at the bottom where it is exposed to the glue. Then pull up the rubber from the top of the blade until plastic sheet #1 is exposed and carefully remove the plastic sheet. Next, just lay the rubber sheet out the rest of the way. This is not perfect, but it works well for me. |
Posted By: fmarek
Date Posted: 06/16/2019 at 2:41am
I never tried this. Are you saying that water based glue which is on the rubber and blade will not stick to that film? I guess removing of that film might be tricky. ------------- 729 Green Goblin 5, FH: 729 Battle II National H39, BH: Palio HK1997 Gold. DHS Long 5, FH: 729 Battle II Gold H40, BH: Nittaku C1 |
 symbat wrote:
Posted By: fmarek
Date Posted: 06/16/2019 at 3:07am
|
I do it this way: 1. Before putting any glue lay rubber on the blade and with pen mark 2mm line on the edge of the rubber (edge which is facing the handle). Some handles like MYABI have center line clearly visible, otherwise put some tape on the handle and mark where is the center. This step is simple and obvious. 2. Optionally mark where are both sides of the handle touches the rubber. 3. When putting a glue on the blade and rubber I leave 5-7mm dry without any glue. That edge goes the full width from left to right, no glue. Easy. 4. Once glue is ready and transparent. Blade lays flat, handle is facing me, tip of the blade is facing forward I take rubber by holding on left and right edges with both hands and stand it on the very tip of the handle. Basically you get bottom of the rubber touching the handle and top of the rubber up 45 degrees angle. 5. Now it is super easy to align marks with the handle and push rubber a little forward so that it "falls" down from the handle on to the blade. I am still holding the rubber. Glued areas on the blade and rubber do not touch yet, but rubber edge is already on the blade so I can do horizontal adjustments easily, also making sure rubber is parallel to the handle top. 6. Once I am happy with alignment, I press with my right thumb onto the very center of the rubber just above the handle to fix it there. 7. Move left hand to grab a tip of the rubber. First goes index finger, then the rest. 8. At this point resume breathing :) "hard" part is over. Now while still pressing with right thump, put right index and middle fingers on the rubber and slide forward gently pressing rubber onto the blade working from bottom up. Glued areas meet and stick. 9. Roll the water bottle in the direction from handle to the tip of the blade. PS: 5-7mm edge just above the handle remains without glue. Does it matter - no. Worried about sweat - seal 1cm on the blade. Actually I do seal wings and about 1 cm into the blade body but it is optional. ------------- 729 Green Goblin 5, FH: 729 Battle II National H39, BH: Palio HK1997 Gold. DHS Long 5, FH: 729 Battle II Gold H40, BH: Nittaku C1 |
Posted By: Lula
Date Posted: 06/16/2019 at 8:23am
| why do you need to reglue? |
Posted By: fmarek
Date Posted: 06/16/2019 at 8:48am
|
I dont reglue on main racket. But experimenting on spare one. ------------- 729 Green Goblin 5, FH: 729 Battle II National H39, BH: Palio HK1997 Gold. DHS Long 5, FH: 729 Battle II Gold H40, BH: Nittaku C1 |
Posted By: symbat
Date Posted: 06/16/2019 at 11:03am
|
It sticks a little bit You just have to be gentle and carefull. You want the plastic film thin enough so that it will drape around the blade. This allows you to feel around the rubber and get it centered. To shift the rubber you may need to lift and scoot it around. Do not put pressure on the rubber when on the plastic. Same with when the plastic is on the blade. You can do some dry runs with no glue to get a feel for it. You have to hold the blade in place, lift the rubber and peel the plastic all at once. I use my stomach on the handle to stabilize the blade at times. When doing the top of the rubber sheet, I hold the rubber up with my fingers and have my thumb on the end of the handle. This allows me to have a free hand to pull up the plastic sheet.
|
Posted By: symbat
Date Posted: 06/16/2019 at 1:27pm
| I tried marking the rubber and handle, but I would still have alignment issues. |
Posted By: Fulanodetal
Date Posted: 06/23/2019 at 1:06am
|
[QUOTE=mjamja]I dry fit the rubber on the blade. Then I put a strip of painters tape along the top of the handle and onto the rubber. I then cut the tape into right at the bottom of the rubber so the rubber will separate. I add glue and try to align the two pieces of tape as I put the rubber down on the blade. Mark [/QUOTEI find this is the smartest response yet. I will try this next time!  FdT
|
Posted By: symbat
Date Posted: 06/23/2019 at 1:18am
I have been there, done that. I gave up on this method and have had much better success with the thin plastic sheet trick. Good luck
|

Posted By: mjamja
Date Posted: 06/23/2019 at 1:47am
|
if the tape is long enough on each part (handle and rubber) aligning it so each side of the tape on the handle aligns with each side on the rubber almost always means the top is in the right spot. If cocked to one side the torn edges might looked matched, but the sides of the two pieces will not be in a straight line. Not foolproof. Your method may be better. I did not understand it when I read it. I should go back and read it again. Mark - My shots my be missaligned, but my rubbers are not. |
Posted By: Fulanodetal
Date Posted: 06/23/2019 at 11:17am
|
I still think Mark's method to be better . Only thing I would try is not cutting the tape! I would leave the tape intact. Once in place and taped I would just turn the rubber, like a you would turn a page on a book, and apply the glue on blade and rubber, then carefully roll the rubber in place once the glue is dry. If the tape is not sticking then you need better tape, duh! FdT |
Posted By: Fulanodetal
Date Posted: 06/23/2019 at 11:59am
|
Another method that has worked for me, to my surprise, is placing the old rubber onto the blade, with the old glue layer on the rubber, aligning it as best I can, and then using a roller to flatten the rubber, then I put the racket in the clicky press for about an hour or more. The rubber gets stuck to the new blade just as if I have used new layers of glue. The old layer of glue needs to be as intact as possible. I believe Freeshack II is the glue I used. Done this a number of times. The rubber sticks to the blade pretty good! Like I said, I was surprised when this worked out. And not just once! FdT
|
Posted By: symbat
Date Posted: 06/23/2019 at 2:26pm
|
Here are some pics to help explain what I do. I find this to be pretty easy to do. Note, the plastic sheet I am using is very thin. The thinner the better, it helps feel around the edge and get the blade aligned. Pic#1 = lay plastic sheet #1 covering 85% +/- of the blade, leaving the bottom exposed. Pic#2 = lay plastic sheet #2 covering the remainder of the blade. Overlap the first sheet, just slightly Pic#3 = place the rubber and align by feel along the edges. This is why you wan thing plastic. Pic#4 = Lift the bottom of the rubber sheet, while holding the top section in place with slight pressure with your fingers. Remove plastic sheet #2. Pic#5 = lay the rubber back down, the bottom section is now glued to the blade. Pic#6 = lift the top of the rubber and remove plastic sheet #1. Pic#7 = lay the rubber back down and you are done.  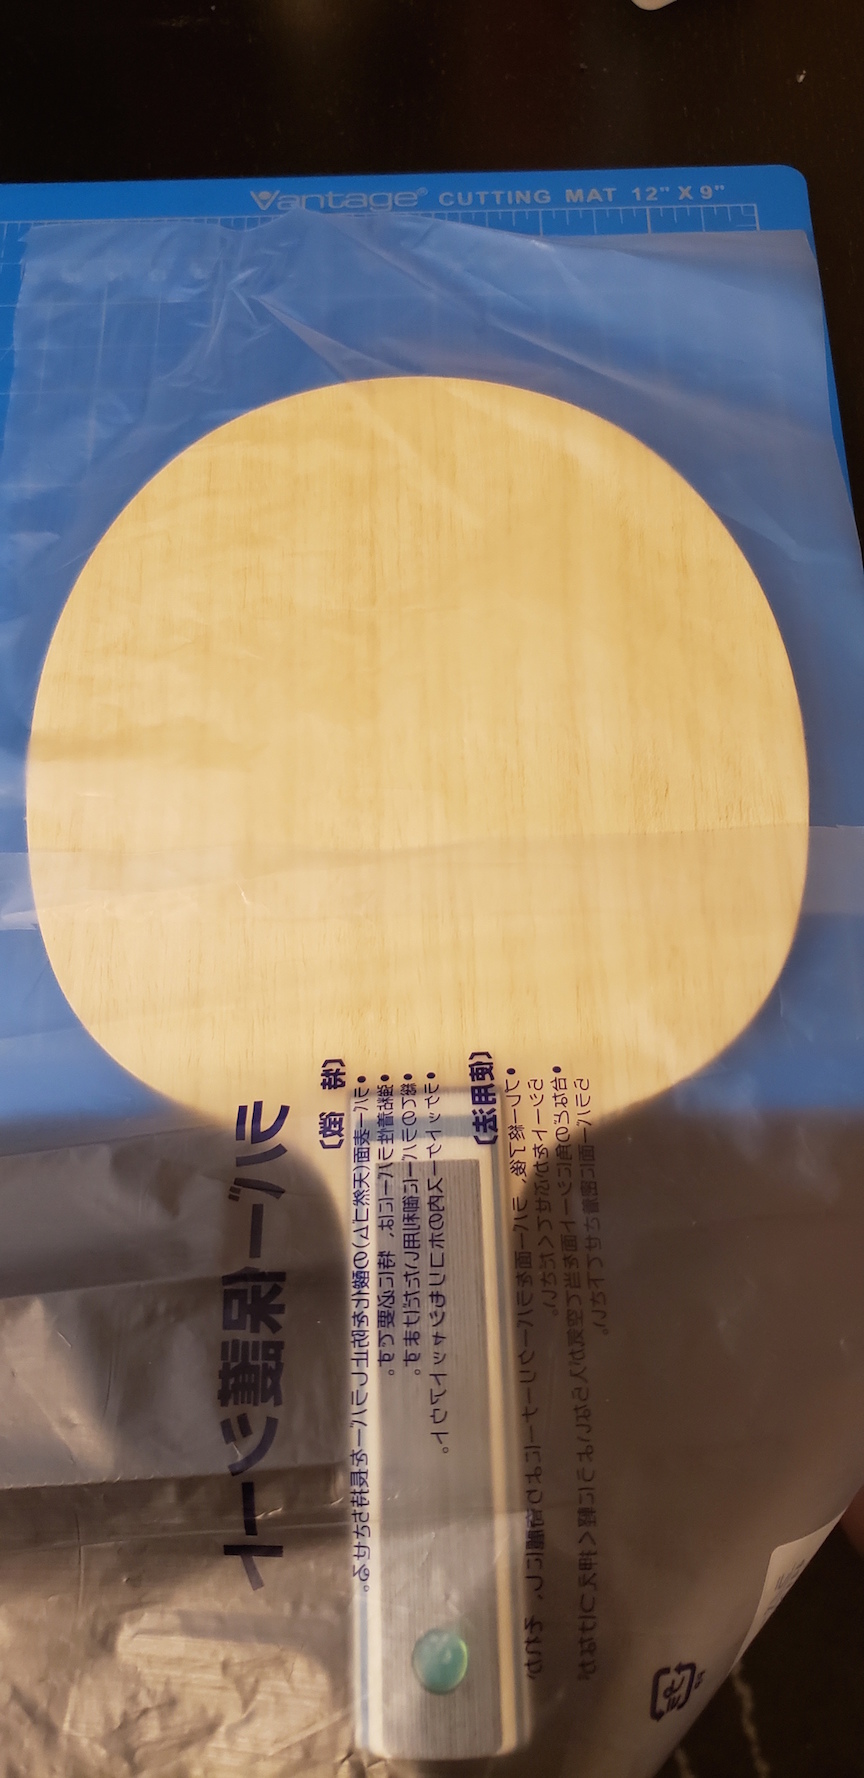 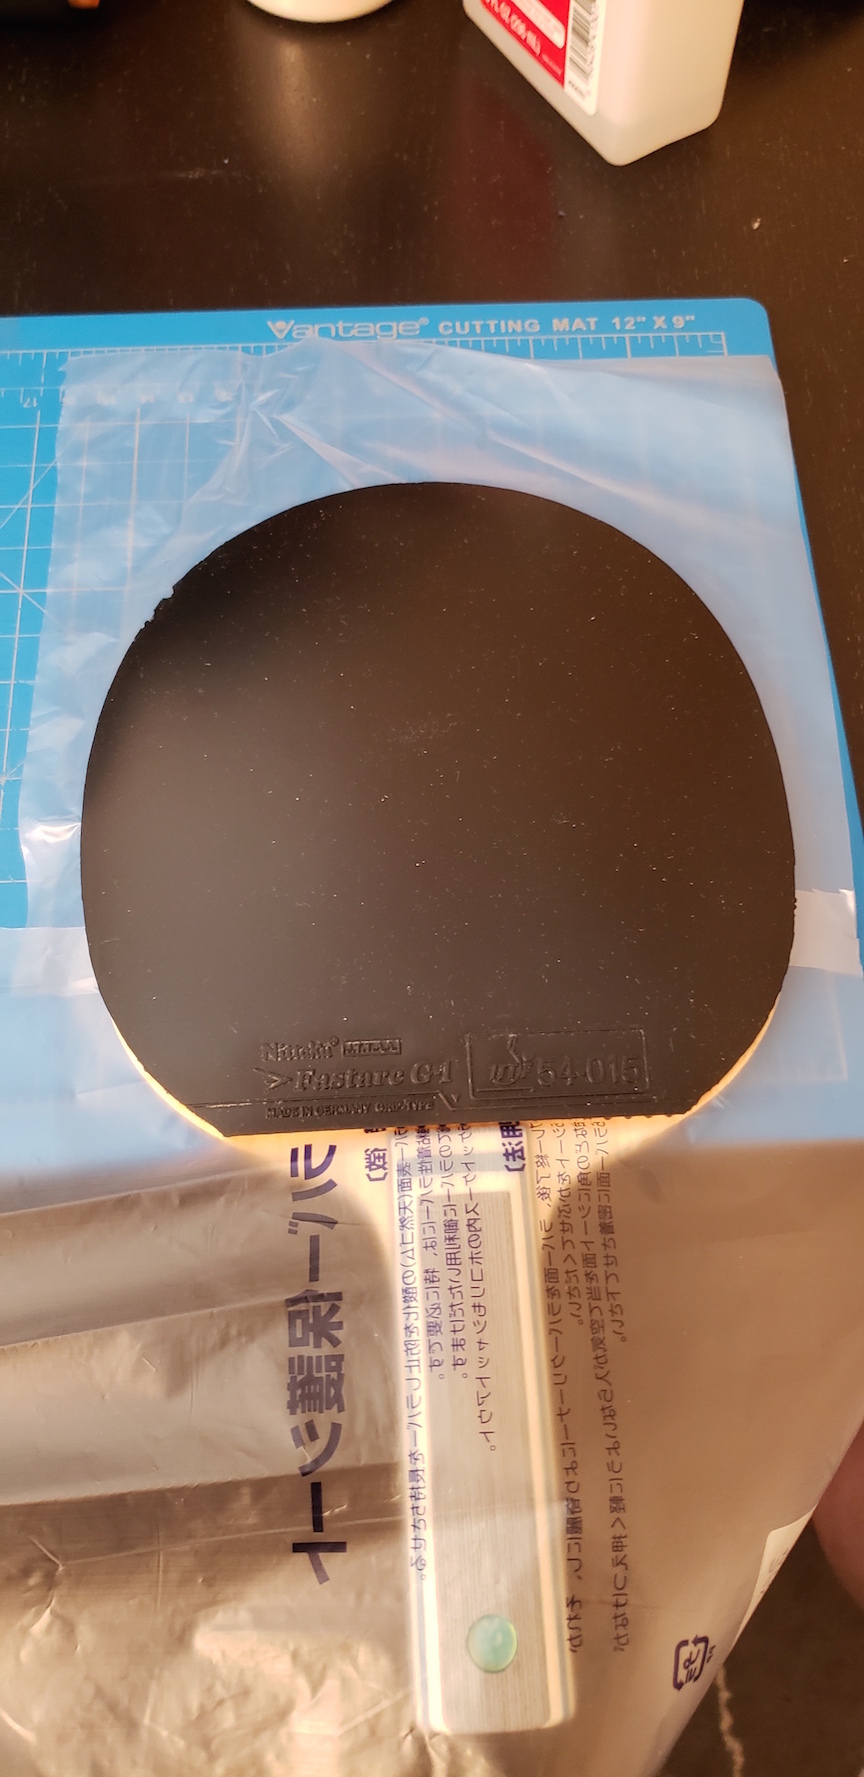   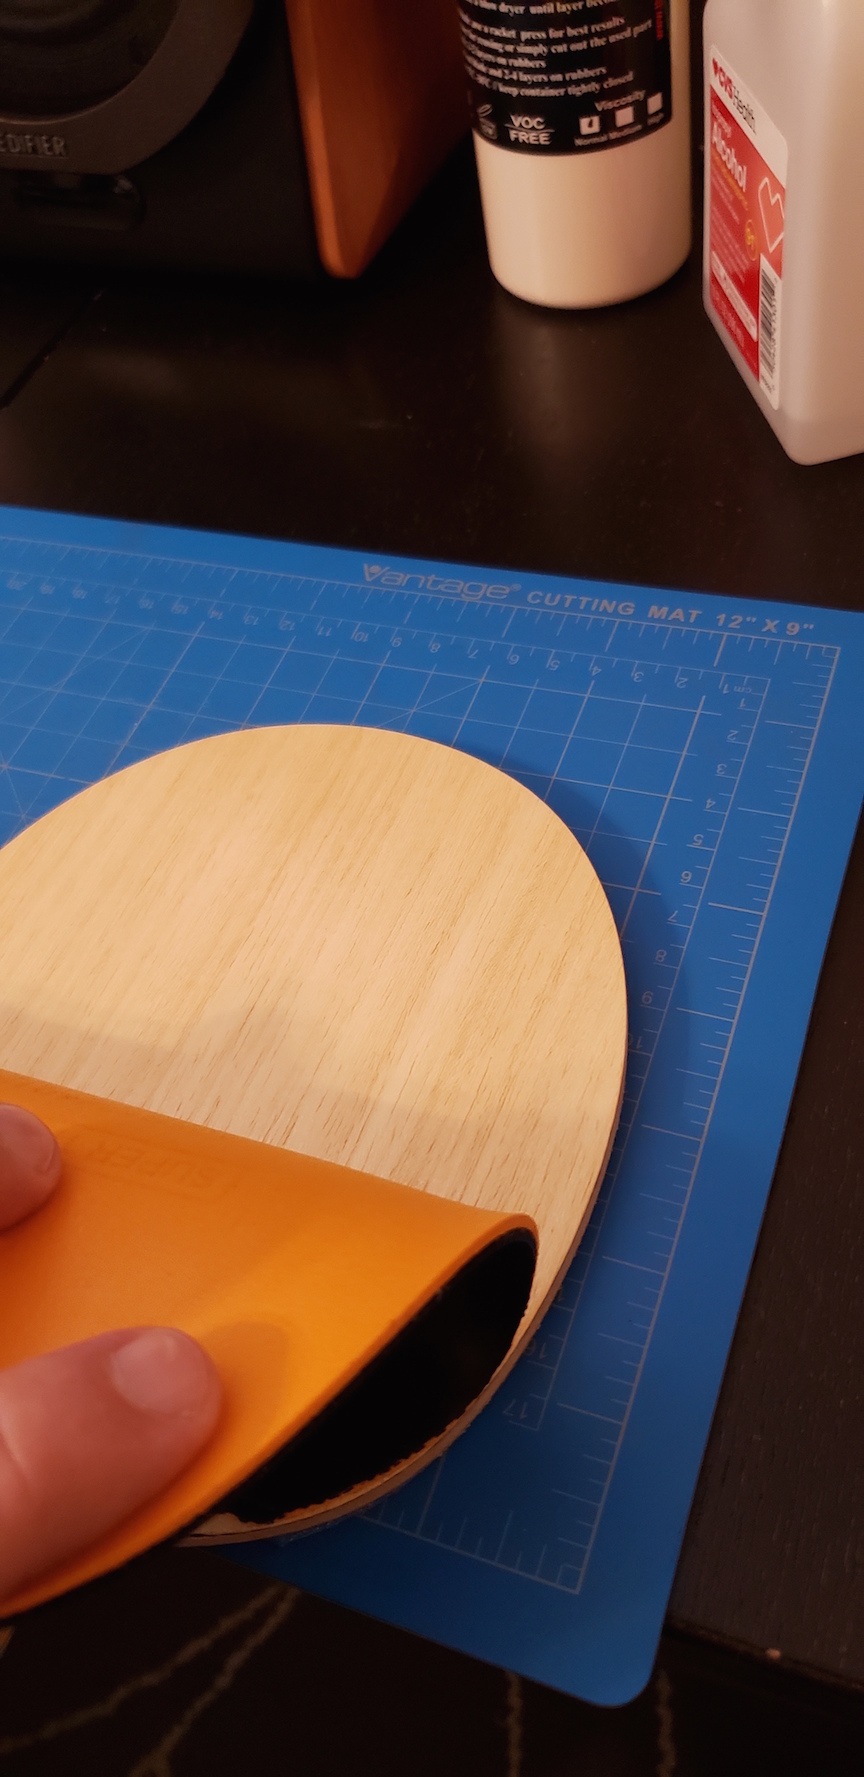 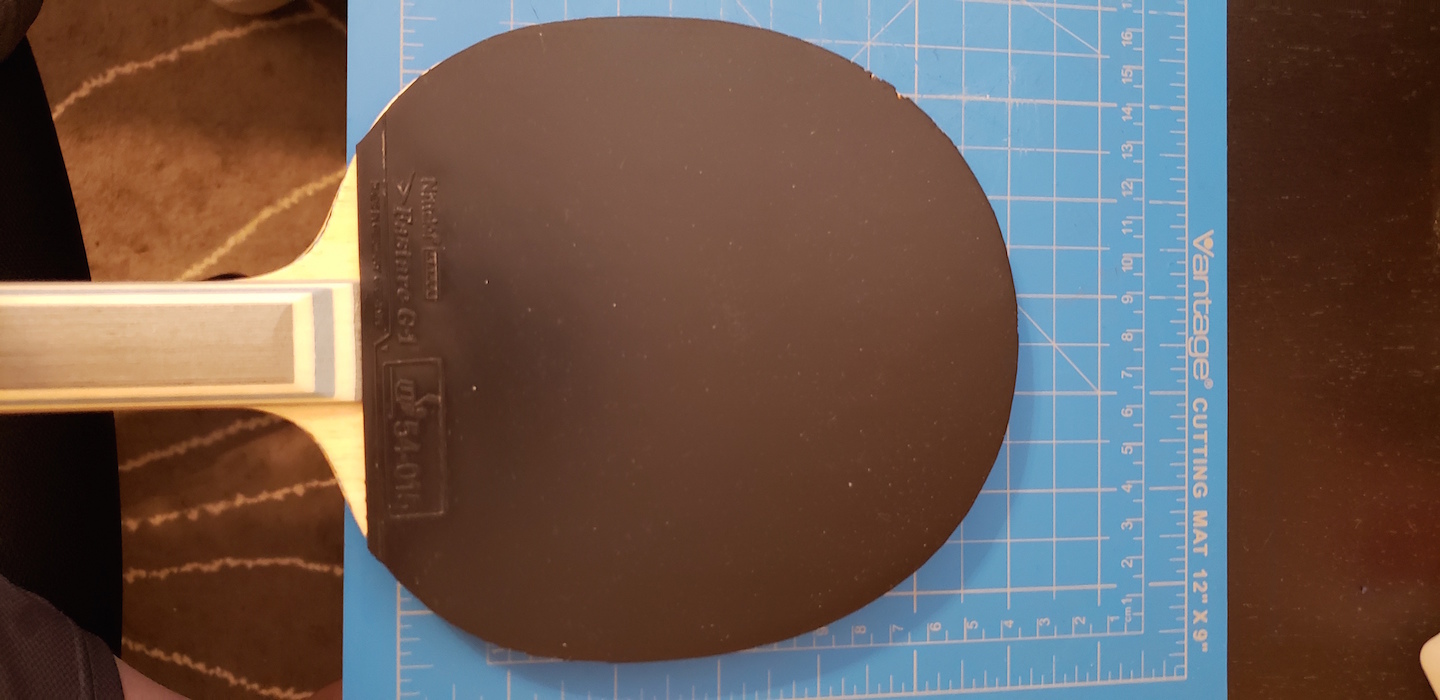 |
Posted By: symbat
Date Posted: 06/23/2019 at 2:27pm
Hm, I will have to give this a try. I do not have a press, but I will figure something out.
|
Posted By: Fulanodetal
Date Posted: 06/23/2019 at 4:51pm
|
Yeah if you don't have a clicky press don't sweat it. A bunch of large heavy books should do the trick! FdT
|